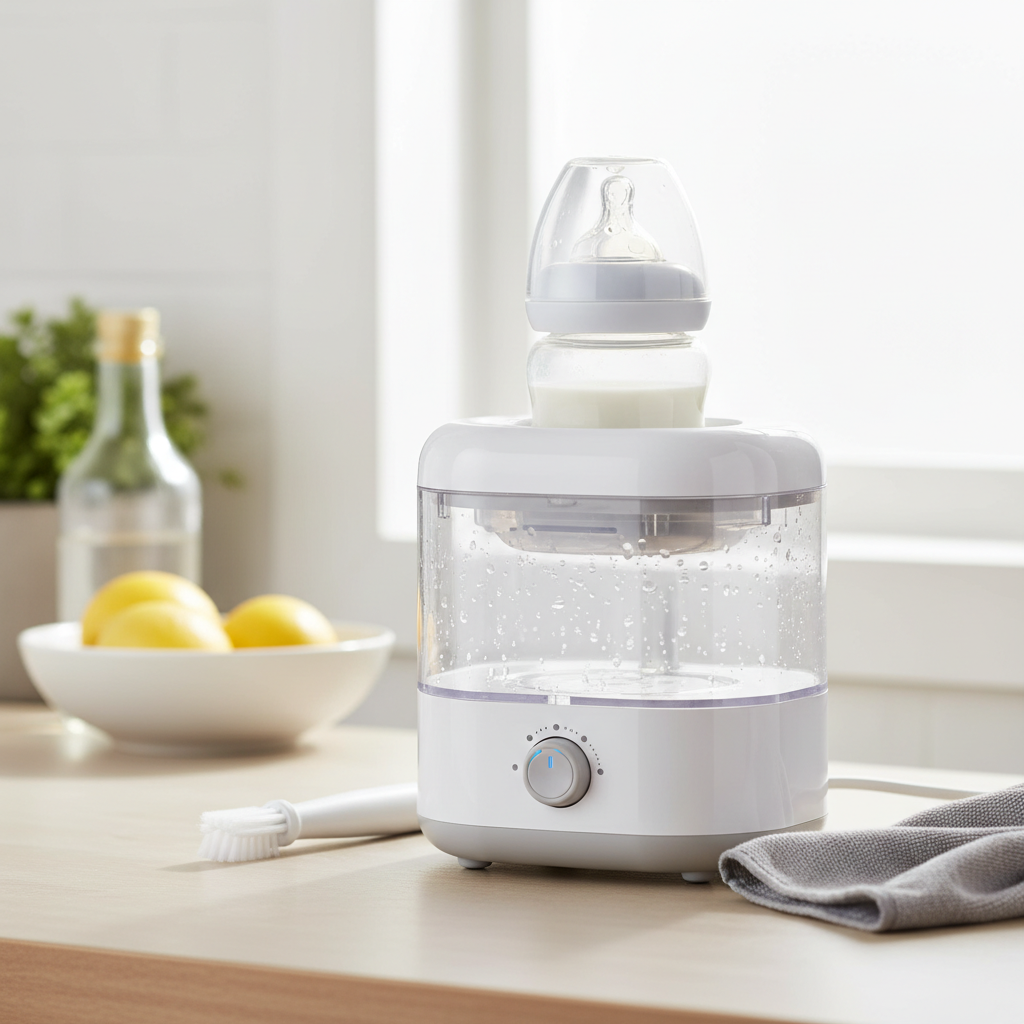
Ensuring your baby’s feeding equipment is meticulously clean is paramount for their health and well-being. Among the many baby essentials, the bottle warmer often gets overlooked, silently accumulating mineral deposits and, sometimes, an unwelcome guest: mold. This guide, drawing on extensive experience with bottle warmer technology, will walk you through effective, safe methods to clean mold from your bottle warmer reservoir, optimize its performance, and prevent future build-up. A clean bottle warmer isn’t just about aesthetics; it’s about providing a safe and hygienic feeding environment for your little one.
Why a Clean Bottle Warmer Matters for Your Baby
|
Our Picks for the Best Milk warmer in 2026
As an Amazon Associate I earn from qualifying purchases.
|
||
| Num | Product | Action |
|---|---|---|
| 1 | Bottle Warmer, Grownsy 8-in-1 Fast Baby Bottle Warmer with Timer, Safe for Breastmilk Nutrients, Accurate Temperature Control, with Defrost, Sterili-zing, Keep Warm, Heats Baby Food & Bottles |

|
| 2 | Milk Frother, 4-in-1 Electric Milk Steamer, 350ml/11.8oz Automatic Frother Machine for Coffee, Warm and Cold Foam, Temperature Control for Latte, Cappuccino, Hot Chocolate |
|
| 3 | Momcozy Portable Bottle Warmer for Travel – Dual Heating Modes for Breast Milk & Water, Portable Milk Warmer with Fast Heating & Long Battery Life, 17 Ounces Large Capacity, Purple |
|
| 4 | Philips Avent Premium Fast Bottle Warmer, with Smart Temperature Control, Water Bath Technology, Automatic Shut-Off, Model SCF358 |
|
| 5 | SIMPLETASTE Milk Frother, 4-in-1 Electric Milk Frother and Steamer, Automatic Warm and Cold Foam Maker and Milk Warmer for Latte, Cappuccinos, Dark Blue |
|
| 6 | Momcozy Baby Bottle Warmer for Breast Milk Formula Food, Fullest Nutrients Preserved, Fast Heat, Night Light for Nighttime Breastfeeding, One-Touch Easy Use, Newborn Essentials Supplies Gift for Mom |
|
| 7 | Momcozy Portable Bottle Warmer for Travel – Dual Heating Modes for Breast Milk & Water, Portable Milk Warmer with Fast Heating & Long Battery Life, 17 Ounces Large Capacity to Meet Your All-Day Needs |
|
| 8 | Gevi Milk Frother,5 in 1 Stainless Steel Professional Milk Steamer,Easy to Clean Hot Chocolate Maker,for Hot and Cold Milk Frother for Latte,Macchiato,Cappuccino and Hot Chocolate |
|
| 9 | SIMPLETASTE Milk Frother, 4-in-1 Electric Milk Steamer, Automatic Warm and Cold Foam Maker and Milk Warmer for Latte, Cappuccinos, Macchiato |
|
| 10 | Baby Brezza New and Improved Formula Pro Advanced Formula Dispenser Machine - Automatically Mix a Warm Formula Bottle Instantly - Easily Make Bottle with Automatic Powder Blending, White |
|
A bottle warmer’s primary function is to gently heat milk or food, making mealtime easier and safer for babies. However, the consistent presence of water and warmth creates an ideal breeding ground for bacteria, limescale, and even mold if not properly maintained. Limescale, a white, chalky residue, is a common issue from hard water and can impede your warmer’s efficiency. Mold, often appearing as black, green, or fuzzy spots, is a more concerning contaminant. While direct contact with baby’s milk is typically low, airborne spores or transfer via hands can pose risks. Maintaining a pristine warmer safeguards your baby from potential contaminants and ensures the device functions optimally for years.
When to Clean Your Bottle Warmer
Establishing a routine for cleaning your bottle warmer is critical. Ideally, the reservoir water should be emptied and the unit air-dried after each use to minimize moisture retention and prevent growth. For a deeper clean, a weekly descaling and cleaning process is highly recommended. You’ll know it’s time for a thorough clean if you notice:
- Visible spots, discoloration, or fuzzy patches in the reservoir.
- White, chalky, or crusty buildup (limescale) on heating elements or surfaces.
- A change in the warmer’s efficiency, such as slower heating times, due to mineral accumulation.
Essential Cleaning Supplies for a Sparkling Reservoir
Before you begin, gather these common household items. You likely have most of them already:
- White Vinegar: The superhero of natural cleaning, effective against both mold and limescale.
- Distilled Water: Helps prevent future mineral buildup, especially if your tap water is hard.
- Soft Cloths or Paper Towels: For wiping surfaces.
- Small Brushes: A bottle brush, an old toothbrush, or even cotton swabs for reaching nooks and crannies.
- (Optional) Hydrogen Peroxide (3% solution): For stubborn mold, a powerful sanitizer that breaks down to water and oxygen.
- (Optional) Mild Dish Soap: For cleaning removable components.
Step-by-Step Guide to Cleaning Mold from Your Bottle Warmer Reservoir
Always ensure the bottle warmer is unplugged and completely cool before starting any cleaning process. Safety first!
Step 1: Prepare Your Warmer
Unplug the bottle warmer from the power outlet and allow it to cool down for at least 30 minutes if it was recently used. Carefully empty any remaining water from the reservoir. Remove any detachable parts, such as baskets or bottle holders, as these will be cleaned separately.
Step 2: The White Vinegar Soak Method
White vinegar is a highly effective, natural, and safe solution for both descaling and tackling mold in your bottle warmer.
- Create the Solution: Pour a mixture of white vinegar and water into the reservoir. A common ratio is 1:1 (equal parts vinegar and water), or you can use 2 ounces of vinegar for every 4 ounces of cold water. For heavy buildup, a stronger vinegar solution or even undiluted vinegar can be used briefly.
- Soak: Let the vinegar solution sit in the reservoir. For light mineral buildup or minor mold, 15-30 minutes might suffice. For more stubborn mold or extensive limescale, allow it to soak for several hours or even overnight.
- Scrub: After soaking, use a small brush (like a bottle brush or an old toothbrush) to gently scrub away any loosened mold or limescale from the reservoir walls and heating plate. You can also carefully shake the reservoir for about 15-30 seconds to help dislodge particles.
- Rinse Thoroughly: Empty the vinegar solution and rinse the reservoir thoroughly with clean, fresh water. Repeat the rinsing multiple times to ensure all vinegar residue and loosened debris are completely gone. Fill the reservoir with clean water and run a warming cycle without a bottle to further flush out any lingering odors or particles, then discard the water.
Step 3: For Stubborn Mold (Hydrogen Peroxide or Diluted Bleach)
If vinegar alone doesn’t entirely eliminate the mold, stronger sanitizers can be used with extreme caution and meticulous rinsing.
- Hydrogen Peroxide Method: Hydrogen peroxide (3% solution) can kill mold at a cellular level and acts as a mild whitening agent. Mix a 1:1 ratio of 3% hydrogen peroxide with water. Pour it into the reservoir and let it sit for about 30 minutes. Thoroughly scrub and rinse multiple times with clean water, followed by a plain water warming cycle to ensure no residue remains. Hydrogen peroxide breaks down into water and oxygen, making it a safer option than bleach if thoroughly rinsed.
- Diluted Bleach Method: While effective, bleach should be used as a last resort due to its strong chemical nature and the need for extremely thorough rinsing. Mix a solution of 1 teaspoon of bleach with 1 gallon of water, or a 50/50 bleach and water solution for very tough stains. Pour a small amount into the reservoir, ensuring it only contacts the affected areas. Let it sit for no more than 10-15 minutes. Immediately empty the reservoir and rinse it extensively—at least 5-7 times with clean water. Run several plain water warming cycles to ensure all bleach residue is gone. Always wear gloves and ensure good ventilation when using bleach.
Step 4: Clean Removable Parts
While the main unit should never be submerged, removable parts like bottle baskets or rings can be washed separately. Use warm water and a mild dish soap to scrub these components clean. Rinse them thoroughly and allow them to air dry completely before reassembling.
Step 5: Final Rinse and Air Dry
After cleaning, perform a final rinse of the reservoir with clean water. It’s crucial to allow all components, especially the reservoir, to air dry completely before storage or next use to prevent immediate mold regrowth. Leaving the lid off or the reservoir exposed to air helps moisture evaporate.
“Regular maintenance is the cornerstone of hygiene. Neglecting your bottle warmer can lead to unforeseen issues, but simple, consistent cleaning with natural agents like vinegar can keep it pristine and safe.” – Dr. Eleanor Vance, Pediatric Environmental Health Specialist
Preventing Future Mold Growth
Prevention is always better than cure. By adopting a few simple habits, you can significantly reduce the chances of mold and limescale returning to your bottle warmer.
- Empty After Each Use: Never leave standing water in the reservoir. Always empty it out immediately after you’ve finished warming a bottle.
- Air Dry Completely: After emptying, leave the reservoir open or inverted to allow it to air dry thoroughly. Moisture is mold’s best friend.
- Use Distilled Water: If you live in an area with hard water, using distilled water instead of tap water can dramatically reduce limescale buildup.
- Establish a Routine: Make weekly descaling with vinegar a non-negotiable part of your kitchen cleaning routine. This proactive approach tackles mineral buildup before it becomes a problem and discourages mold growth.
- Proper Storage: If storing the warmer for an extended period, ensure it is completely dry and store it in a cool, dry place.
Conclusion
A clean bottle warmer is an integral part of safe and healthy feeding for your baby. While the thought of mold can be alarming, a combination of regular cleaning, effective natural solutions like white vinegar, and diligent drying practices can keep your appliance hygienic and functioning perfectly. By following these steps and incorporating preventative measures, you can ensure your bottle warmer remains a reliable and safe tool for preparing your baby’s meals, giving you peace of mind and one less thing to worry about in the busy world of parenting. What are your favorite tips for keeping baby gear spotless?
Frequently Asked Questions
Is mold in a bottle warmer harmful to my baby?
While concerning, the risk of harm to your baby from mold in the bottle warmer reservoir is generally considered low, as the milk typically does not come into direct contact with the reservoir water. However, it’s essential to clean it thoroughly to eliminate any potential for contamination and maintain a hygienic environment. If you suspect your baby has ingested mold spores and shows symptoms like vomiting or diarrhea, consult a doctor.
How often should I clean my bottle warmer?
For optimal hygiene, it’s best to empty the water and allow the reservoir to air dry after each use. A deeper clean and descaling with white vinegar should be performed at least once a week, or more frequently if you notice limescale or mold buildup.
Can I use dish soap to clean my bottle warmer?
Mild dish soap can be used to clean removable components like bottle baskets or rings. However, avoid using dish soap directly in the main heating reservoir, as residue can be difficult to rinse thoroughly and may affect performance or leave an odor. White vinegar is generally preferred for the main unit.
What’s the difference between mold and limescale?
Limescale is a hard, white, or off-white mineral deposit caused by hard water evaporating, often found on heating elements. Mold, on the other hand, is a living fungus that appears as fuzzy, black, green, or sometimes pink spots, thriving in damp, warm environments. While both can accumulate in a bottle warmer, white vinegar is effective at removing both.