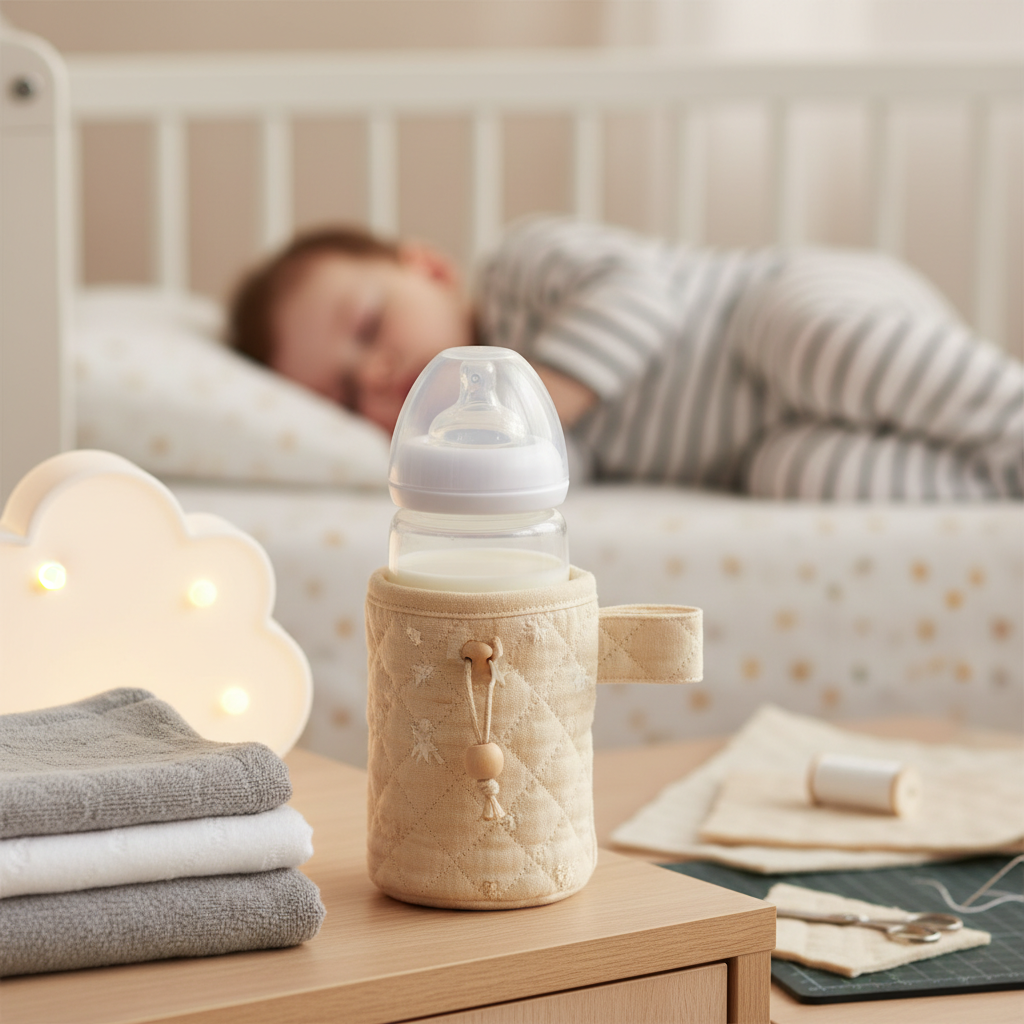
As a parent, ensuring your baby’s milk or formula is at the ideal temperature can be a constant concern, especially when you’re out and about or navigating those sleepy late-night feedings. Fumbling with complicated warmers or relying on guesswork can add unnecessary stress to an already demanding routine. Imagine the convenience of a simple, portable solution that keeps bottles warm for longer, without needing electricity or extra fuss. This guide will walk you through creating your own DIY thermal bottle warmer sleeve, empowering you to maintain the perfect temperature for your little one’s sustenance with ease and style.
The Unseen Benefits of a Homemade Thermal Bottle Sleeve
|
Our Picks for the Best Milk warmer in 2026
As an Amazon Associate I earn from qualifying purchases.
|
||
| Num | Product | Action |
|---|---|---|
| 1 | Baby Brezza New and Improved Formula Pro Advanced Formula Dispenser Machine - Automatically Mix a Warm Formula Bottle Instantly - Easily Make Bottle with Automatic Powder Blending, White |

|
| 2 | Momcozy Portable Bottle Warmer for Travel – Dual Heating Modes for Breast Milk & Water, Portable Milk Warmer with Fast Heating & Long Battery Life, 17 Ounces Large Capacity, Purple |
|
| 3 | SIMPLETASTE Milk Frother, 4-in-1 Electric Milk Steamer, Automatic Warm and Cold Foam Maker and Milk Warmer for Latte, Cappuccinos, Macchiato |
|
| 4 | Philips Avent Premium Fast Bottle Warmer, with Smart Temperature Control, Water Bath Technology, Automatic Shut-Off, Model SCF358 |
|
| 5 | Gevi Milk Frother,5 in 1 Stainless Steel Professional Milk Steamer,Easy to Clean Hot Chocolate Maker,for Hot and Cold Milk Frother for Latte,Macchiato,Cappuccino and Hot Chocolate |
|
| 6 | Momcozy Portable Bottle Warmer for Travel – Dual Heating Modes for Breast Milk & Water, Portable Milk Warmer with Fast Heating & Long Battery Life, 17 Ounces Large Capacity to Meet Your All-Day Needs |
|
| 7 | Bottle Warmer, Grownsy 8-in-1 Fast Baby Bottle Warmer with Timer, Safe for Breastmilk Nutrients, Accurate Temperature Control, with Defrost, Sterili-zing, Keep Warm, Heats Baby Food & Bottles |
|
| 8 | Milk Frother, 4-in-1 Electric Milk Steamer, 350ml/11.8oz Automatic Frother Machine for Coffee, Warm and Cold Foam, Temperature Control for Latte, Cappuccino, Hot Chocolate |
|
| 9 | SIMPLETASTE Milk Frother, 4-in-1 Electric Milk Frother and Steamer, Automatic Warm and Cold Foam Maker and Milk Warmer for Latte, Cappuccinos, Dark Blue |
|
| 10 | Momcozy Baby Bottle Warmer for Breast Milk Formula Food, Fullest Nutrients Preserved, Fast Heat, Night Light for Nighttime Breastfeeding, One-Touch Easy Use, Newborn Essentials Supplies Gift for Mom |
|
Why should you consider making a thermal bottle warmer sleeve when there are commercial options available? The benefits extend far beyond just cost savings. A DIY sleeve offers unparalleled convenience and peace of mind, making feeding times smoother and more enjoyable for both you and your baby.
Firstly, a homemade sleeve helps maintain the desired milk temperature for extended periods. Whether you’re trying to keep warm milk from cooling too quickly or chilled formula from warming prematurely, the insulating properties of a well-made sleeve are invaluable. This ensures your baby’s drink is always just right, reducing waste and providing comfort on demand. Secondly, these sleeves are incredibly portable and require no power source, making them perfect for travel, strolls in the park, or errands. Lastly, crafting your own sleeve allows for complete personalization. You can choose fabrics that match your style, baby gear, or even commemorate special memories, transforming a practical item into a cherished accessory.
Essential Materials for Your Thermal Bottle Warmer Sleeve
Creating an effective thermal bottle warmer sleeve starts with selecting the right materials. The key lies in layering fabrics with excellent insulating properties to trap heat (or cold) efficiently. Don’t worry if you’re new to sewing; these materials are widely available and easy to work with.
For the outer layer, choose cute cotton fabrics, soft fleece, or durable knit materials. These fabrics are not only visually appealing but also easy to clean and gentle to the touch. The crucial component for insulation is a thermal batting like Insul-Bright insulated lining, a specialized material featuring metalized polyester film that reflects heat. Alternatively, you can use other forms of thermal batting or even repurpose neoprene from old koozies for a simpler design. For the interior lining, Polyurethane Laminate (PUL) fabric is an excellent choice as it is water-resistant, protecting the insulation layers from spills and making the sleeve easier to sanitize. Finally, you’ll need a reliable closure system such as a drawstring with a cord or ribbon, or a simple yet secure Velcro strip (hook and loop tape). Gather your sewing machine, matching thread, sharp scissors or a rotary cutter, pins or clips (especially helpful for PUL), a measuring tape, and an iron.
Step-by-Step Guide: Crafting Your Thermal Bottle Sleeve (Sewing Method)
Making a thermal bottle sleeve is a rewarding project that can be completed in a few straightforward steps. Here’s how to construct a durable and effective sleeve using basic sewing techniques.
1. Prepare Your Pattern and Cut Fabrics
Begin by accurately measuring your baby bottle. You’ll need its height and circumference. Add a seam allowance of approximately ½ inch to all measurements for comfortable stitching. You can either create a simple rectangular pattern for the body and a circular or squared pattern for the base, or download a specialized baby bottle sleeve pattern online. Once your pattern is ready, carefully cut one piece each from your chosen outer fabric, the insulating material, and the lining fabric. Ensuring precise cuts at this stage will significantly help with the assembly later.
2. Construct the Outer Sleeve
With your fabric pieces prepared, it’s time to assemble the exterior of your bottle sleeve. Take your outer fabric rectangle and fold it in half lengthwise, right sides together. Stitch along the raw edge to form a tube, creating the main body of the sleeve. Press the seam open. Next, take your outer fabric base piece (circle or square) and align it with the bottom opening of the fabric tube, right sides together. Pin securely around the entire circumference, easing the fabric as needed. Stitch the base to the tube, then trim any excess seam allowance. If you plan to include a carrying strap or a loop for attachment, now is the time to prepare and attach one side of it to the upper portion of your outer sleeve, centered or as desired.
3. Assemble the Insulated Lining
The core of your thermal sleeve is the insulated lining. Start by taking your thermal batting piece and folding it in half lengthwise, wrong sides together. Use a wide zig-zag stitch to sew the raw edges together, creating a tube. The zig-zag stitch is recommended here as it helps to keep the often-slippery Insul-Bright from shifting and prevents bulk in the seam. Attach the thermal batting base to this tube using the same zig-zag stitching method, butt-joining the edges rather than overlapping them. Repeat this entire process for your water-resistant PUL lining fabric, forming a separate lining tube with its own base. Once both the thermal and PUL layers are constructed, carefully slip the PUL lining tube inside the thermal batting tube, aligning their raw upper edges and any seams. This creates a robust, two-layer insulated core.
4. Integrate Closure Mechanism
A reliable closure is essential to keep the bottle secure and to maximize insulation. If you opt for drawstrings, create a casing by folding down the top raw edge of your outer sleeve (after it’s fully constructed and turned right side out) by about ½ inch, then another 1 inch, pressing firmly. Stitch along the bottom edge of this fold, leaving small openings on either side of the back seam to thread your cord or ribbon through. For a Velcro closure, once your outer sleeve is complete, attach one side of the Velcro strip (e.g., the hook side) to the top edge of the outer sleeve. If you’re using a strap, attach the corresponding loop side of the Velcro to the strap itself, ensuring they will align properly when wrapped around the bottle.
5. Final Assembly
This is where all your layers come together. With your outer sleeve turned right side out and your combined thermal/PUL lining turned wrong side out, carefully slip the lining inside the outer sleeve. Align the upper raw edge of the lining/insulation layers with the top crease line of the outer sleeve’s previously prepared hem (if using a drawstring casing). Fold the outer fabric hem down over the raw edges of the interior layers, first by ½ inch and then another 1 inch, pressing thoroughly. Pin this hem securely in place, making sure to encase all raw edges. Finally, edgestitch around the upper edge of the sleeve, close to the inner fold, stitching through all layers. This secures the hem and holds your thermal sleeve together, creating a clean, professional finish.
No-Sew Alternative: Repurposing Neoprene Koozies
While sewing offers the most durable and customizable solution, a quick no-sew option exists by repurposing neoprene koozies. This method is ideal for those seeking a fast, minimalist approach without a sewing machine. Simply acquire two standard neoprene can koozies. Measure them against your baby bottle. You might need to carefully cut one koozie to form the base and potentially a small extension for height, and the other for the main body. Use a strong, waterproof fabric glue or even heavy-duty double-sided fabric tape to join the pieces. Alternatively, hand-stitching with a durable thread can create a surprisingly robust and effective insulator. This method provides decent insulation but might not be as durable or aesthetically refined as a sewn version.
Expert Tips for Success and Durability
To ensure your DIY thermal bottle warmer sleeve is both effective and long-lasting, consider these expert tips. Always pre-wash your fabrics before cutting and sewing. This prevents any future shrinkage that could distort your sleeve’s fit. When working with different materials, particularly the thicker insulating layers, use the correct sewing machine needle size and type; a denim or sharp needle can prevent skipped stitches and fabric damage. For insulating materials like Insul-Bright and slippery linings like PUL, a zig-zag stitch provides more flexibility and prevents the layers from pulling apart. Prioritizing a water-resistant lining like PUL is crucial for easy cleaning and hygiene, especially for baby items. Remember to always test the fit with your specific baby bottle throughout the construction process to ensure it’s snug yet easy to insert and remove.
“A well-crafted thermal bottle sleeve isn’t just a convenience; it’s a testament to thoughtful parenting, ensuring nourishment is always at its best.” – Admin, reviewxoo.com
Conclusion
Crafting your own DIY thermal bottle warmer sleeve is a practical and rewarding project that offers significant benefits for busy parents. From maintaining the perfect temperature for your baby’s milk to providing a portable and personalized solution, these sleeves bring convenience and peace of mind to your daily routine. By carefully selecting your materials and following our step-by-step guide, you can create a durable and stylish accessory that simplifies feeding times, whether you’re at home or on the go. Embrace the satisfaction of a handmade solution that caters perfectly to your little one’s needs.
What unique fabric combinations will you choose to make your baby’s feeding journey even cozier?
Frequently Asked Questions
How long does a DIY thermal sleeve keep a bottle warm?
A well-constructed DIY thermal sleeve, especially one utilizing Insul-Bright and a snug fit, can keep a bottle warm for 1-3 hours, depending on external temperatures and the initial warmth of the liquid. For colder liquids, it can similarly extend the cool temperature.
Can I make a no-sew version of a thermal bottle sleeve?
Yes, a no-sew version is possible using neoprene koozies and strong fabric glue or by wrapping an insulating material like batting and securing it with heavy-duty fabric tape or Velcro. However, sewn versions generally offer greater durability and better insulation.
What is the best insulating material for a DIY bottle warmer sleeve?
Insul-Bright insulated lining is widely considered one of the best materials for DIY thermal sleeves due to its heat-reflective properties. Neoprene is another excellent choice, often found in pre-made insulated products and can be repurposed effectively.
Is it safe to use a DIY thermal sleeve for baby bottles?
Yes, it is generally safe, provided you use clean, baby-friendly fabrics and ensure the sleeve fits snugly without impeding the bottle’s function. Always monitor milk temperature before feeding to ensure it’s appropriate for your baby.
How do I clean my DIY bottle warmer sleeve?
For sleeves made with washable fabrics and PUL lining, most can be machine washed on a gentle cycle with mild detergent and air-dried. Avoid high heat in dryers as it can damage insulating materials like Insul-Bright or PUL. Regular cleaning is essential for hygiene.