Bringing a new baby home is a journey filled with joy, and often, a practical approach to baby gear is essential. Second-hand bottle warmers can be a fantastic way to save money and reduce waste, but before they touch your baby’s feeding essentials, thorough sanitization is not just recommended—it’s crucial. These devices, even if they appear clean, can harbor invisible residues, bacteria, or mineral buildup from previous use. Ensuring every component is meticulously cleaned and sanitized guarantees your little one’s health and safety, providing you with peace of mind.
Why Thorough Sanitization is Non-Negotiable for Used Bottle Warmers
When you acquire a second-hand bottle warmer, you’re not just inheriting the device itself, but potentially years of unseen residue and microorganisms. The warm, moist environment inside these appliances is an ideal breeding ground for bacteria and mold if not properly maintained. Furthermore, hard water deposits can accumulate, reducing efficiency and potentially flaking into your baby’s milk.
Beyond visible grime, there are compelling reasons to prioritize deep cleaning and sanitization:
- Eliminating Harmful Germs: Bacteria, viruses, and mold spores can thrive in residual milk or water. A comprehensive sanitization process targets these invisible threats, protecting your baby from potential illnesses.
- Preventing Mineral Buildup: Hard water leaves behind limescale, which can impede the warmer’s heating efficiency and may even contaminate the feeding water. Descaling is vital for optimal performance and hygiene.
- Ensuring Food Safety Standards: Any item that comes into contact with your baby’s food or drink must meet stringent cleanliness standards. A second-hand warmer requires extra care to meet these benchmarks.
- Extending Appliance Lifespan: Regular and proper cleaning, especially descaling, prevents internal components from deteriorating, ensuring your bottle warmer lasts longer and functions reliably.
Understanding Different Bottle Warmer Types and Their Cleaning Nuances
Bottle warmers come in various designs, and understanding their mechanisms is key to effective cleaning and sanitization. While the core principles remain similar, specific attention to detail based on type can make a difference.
- Water Bath Warmers: These are the most common, using a reservoir of water heated to warm the bottle. Brands like Fatzbaby and Munchkin often utilize this method. The primary cleaning focus for these is the water reservoir and heating plate, which are prone to limescale and water stains.
- Steam Warmers: Some advanced models, like certain Philips Avent or Baby Brezza warmers, use steam to heat bottles quickly. While effective, the internal components that generate and circulate steam can still accumulate mineral deposits, especially if tap water is used. These often have a heating plate at the bottom that needs regular descaling.
- Travel/Portable Warmers: Designed for on-the-go convenience, these compact units (e.g., Momcozy portable warmer) may have smaller water chambers or heating elements. While their external surfaces might be easier to wipe down, internal nooks and crannies for water storage still require thorough attention. Disassembling portable warmers as much as possible is important for proper cleaning.
- Multi-functional Warmers (Sterilizer/Warmer Combos): These units often incorporate sterilizing functions alongside warming. While their sterilizing cycle helps, a deep manual clean is still necessary for second-hand units to address ingrained grime and descaling.
Regardless of the type, always refer to the manufacturer’s manual for specific cleaning instructions, as some materials or electronic components might have particular care requirements.
The Step-by-Step Deep Cleaning and Sanitization Process
Before your second-hand bottle warmer is ready for use, follow this comprehensive cleaning and sanitization regimen.
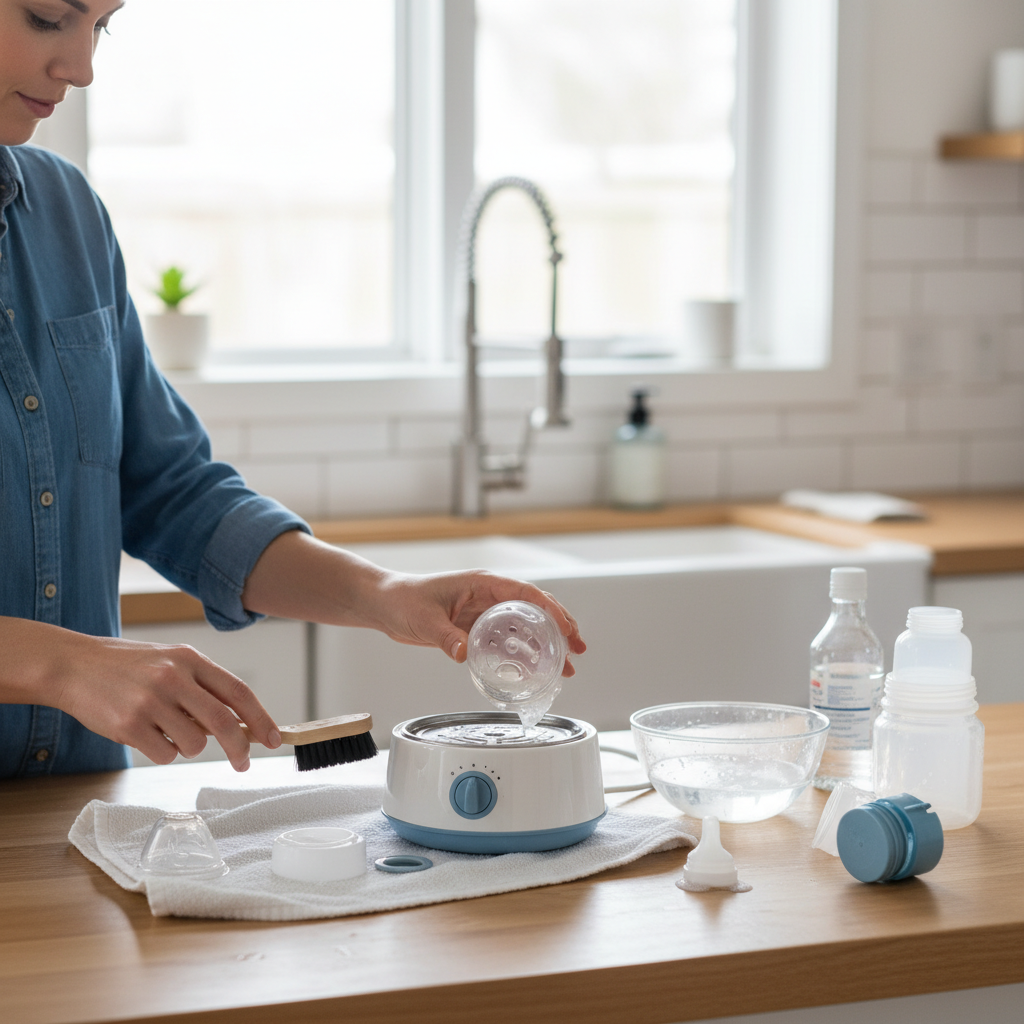
1. Initial Inspection and Pre-Cleaning
- Unplug and Disassemble: Always ensure the warmer is unplugged from the power outlet before you begin. Carefully disassemble any removable parts, such as baskets, rings, or adapters.
- Visual Check: Inspect the warmer thoroughly for any visible damage, cracks, mold, or heavily caked-on residue. Pay close attention to the heating plate, water reservoir, and any crevices. If you spot significant damage or persistent, deep-seated mold that can’t be reached, consider if the warmer is salvageable.
- Wipe Down Exterior: Use a damp cloth with a few drops of mild, unscented dish soap to wipe down the exterior of the warmer. This removes dust, spills, and sticky residues. Rinse the cloth and wipe again to remove any soap residue.
- Wash Removable Parts: Wash any removable plastic or silicone components with warm, soapy water and a bottle brush. Rinse them thoroughly under running water and set aside to air dry.
|
Our Picks for the Best Milk warmer in 2026
As an Amazon Associate I earn from qualifying purchases.
|
||
| Num | Product | Action |
|---|---|---|
| 1 | Gevi Milk Frother,5 in 1 Stainless Steel Professional Milk Steamer,Easy to Clean Hot Chocolate Maker,for Hot and Cold Milk Frother for Latte,Macchiato,Cappuccino and Hot Chocolate |

|
| 2 | SIMPLETASTE Milk Frother, 4-in-1 Electric Milk Frother and Steamer, Automatic Warm and Cold Foam Maker and Milk Warmer for Latte, Cappuccinos, Dark Blue |
|
| 3 | Bottle Warmer, Grownsy 8-in-1 Fast Baby Bottle Warmer with Timer, Safe for Breastmilk Nutrients, Accurate Temperature Control, with Defrost, Sterili-zing, Keep Warm, Heats Baby Food & Bottles |
|
| 4 | Baby Brezza New and Improved Formula Pro Advanced Formula Dispenser Machine - Automatically Mix a Warm Formula Bottle Instantly - Easily Make Bottle with Automatic Powder Blending, White |
|
| 5 | Momcozy Portable Bottle Warmer for Travel – Dual Heating Modes for Breast Milk & Water, Portable Milk Warmer with Fast Heating & Long Battery Life, 17 Ounces Large Capacity, Purple |
|
| 6 | Milk Frother, 4-in-1 Electric Milk Steamer, 350ml/11.8oz Automatic Frother Machine for Coffee, Warm and Cold Foam, Temperature Control for Latte, Cappuccino, Hot Chocolate |
|
| 7 | Philips Avent Premium Fast Bottle Warmer, with Smart Temperature Control, Water Bath Technology, Automatic Shut-Off, Model SCF358 |
|
| 8 | Momcozy Portable Bottle Warmer for Travel – Dual Heating Modes for Breast Milk & Water, Portable Milk Warmer with Fast Heating & Long Battery Life, 17 Ounces Large Capacity to Meet Your All-Day Needs |
|
| 9 | SIMPLETASTE Milk Frother, 4-in-1 Electric Milk Steamer, Automatic Warm and Cold Foam Maker and Milk Warmer for Latte, Cappuccinos, Macchiato |
|
| 10 | Momcozy Baby Bottle Warmer for Breast Milk Formula Food, Fullest Nutrients Preserved, Fast Heat, Night Light for Nighttime Breastfeeding, One-Touch Easy Use, Newborn Essentials Supplies Gift for Mom |
|
2. Descaling for Mineral Buildup
Mineral deposits (limescale) are a common issue, especially with hard water, and can affect performance and hygiene.
- Vinegar Solution: Mix equal parts white vinegar and water. Some sources suggest a 1:2 ratio of vinegar to water for descaling.
- Fill the Warmer: Pour the vinegar solution into the bottle warmer’s water reservoir, up to the maximum fill line.
- Run a Cycle (Optional but Recommended): For many warmers, it’s effective to turn the warmer on at a low setting or a “warm” cycle for 10-15 minutes, allowing the vinegar steam to work on the deposits. Be cautious, as some manufacturers advise against running cycles with vinegar. If unsure, let it soak.
- Soak: Let the solution sit in the warmer for at least 30-60 minutes, or longer for heavy buildup. For stubborn spots, some suggest letting it sit overnight.
- Scrub and Rinse: After soaking, pour out the vinegar solution. Use a soft brush or non-abrasive sponge to gently scrub the heating plate and interior surfaces, dislodging any loosened mineral deposits. Rinse the interior thoroughly with clean water multiple times to remove all traces of vinegar. The goal is to ensure no vinegar smell or taste remains.
3. Disinfection and Sanitization
After cleaning and descaling, sanitization ensures the elimination of harmful microorganisms. The CDC recommends several methods for infant feeding items.
- Boiling: Place disassembled, cleaned parts (if manufacturer-approved for boiling) into a pot and cover with water. Bring to a boil and continue boiling for 5 minutes. Remove items with clean tongs and allow to air-dry.
- Steam Sterilization: If your bottle warmer (or another appliance you have) has a steam sterilizer function, place the cleaned, disassembled parts into it and follow the manufacturer’s instructions. This is a common and effective method for many baby products.
- Bleach Solution (Use with Extreme Caution and only if other methods are not feasible): The CDC advises this method if boiling, steaming, or dishwashing is not possible. Prepare a solution of 2 teaspoons of unscented bleach per gallon (16 cups) of water in a clean wash basin. Immerse all cleaned items completely in the solution, ensuring no air bubbles. Soak for at least 2 minutes. DO NOT RINSE. Remove items with clean hands or tongs and allow them to air-dry completely on a clean, unused dish towel or paper towel. The bleach will break down quickly as it dries and will not harm your baby. Always check the warmer’s manual to ensure it is bleach-safe before using this method for internal components, and ensure parts are thoroughly dry.
4. Final Drying
Allow all components of the bottle warmer to air-dry completely on a clean, dry surface before reassembling or storing. This is critical to prevent mold growth. Do not use a dish towel to rub items dry, as this can transfer germs back onto the sanitized surfaces.
Essential Cleaning Agents and Tools for Effective Sanitization
Having the right arsenal of cleaning supplies makes the sanitization process more efficient and effective.
- White Vinegar: An indispensable natural descaler and disinfectant. Its acidic properties break down mineral deposits and eliminate odors. Use a 1:1 or 1:2 ratio with water for descaling.
- Mild, Unscented Dish Soap: Ideal for general cleaning of surfaces and removable parts. Ensure it’s gentle and leaves no harmful residues.
- Baking Soda: For stubborn stains, a paste of baking soda and water can act as a mild abrasive without scratching surfaces. It also helps with deodorizing.
- Citric Acid: An alternative to vinegar for descaling, especially effective for hard water deposits. Follow product instructions for dilution.
- Soft Brush or Old Toothbrush: Essential for scrubbing tight spaces, crevices, and hard-to-reach areas where milk residue or mineral deposits accumulate.
- Non-Abrasive Sponge or Soft Cloth: For wiping down surfaces without causing scratches.
- Measuring Cup: For accurately mixing cleaning solutions, especially important for bleach.
- Distilled Water: Using distilled water for daily warmer operation can significantly reduce future mineral buildup, extending the life of your warmer and keeping it cleaner for longer.
“When it comes to baby essentials, hygiene is paramount. A second-hand bottle warmer, though a great bargain, demands diligent cleaning and sanitization to remove any lingering risks and ensure it’s truly safe for your little one.” – Dr. Emily R. Carter, Pediatric Health Specialist
Common Challenges and Troubleshooting During Sanitization
Even with the best intentions, you might encounter some common issues when sanitizing a used bottle warmer.
- Stubborn Limescale: If a single vinegar treatment isn’t enough, repeat the descaling process, increasing the soaking time, or using a stronger vinegar solution (e.g., 1 part vinegar to 1 part water). Commercial descalers specifically designed for baby products can also be used, but always rinse extensively.
- Persistent Odors: After descaling and cleaning, lingering smells (especially from previous milk spills or hard water) can be tackled with a baking soda paste applied to affected areas, allowed to sit for a few hours, then scrubbed and rinsed. Thorough drying is also key to preventing smells.
- Mold Discovery: If you find mold, especially black mold, during your initial inspection, extreme caution is advised. Small, surface-level mold might be removed with a bleach solution (as per CDC guidelines) if the warmer’s materials allow and if the mold is accessible. However, if mold is deep within non-removable parts or appears to have stained the plastic permanently, it’s often safer to discard the warmer. Mold spores can be resilient and pose a health risk to infants.
- Rust Stains: Rust, often from metal components or prolonged exposure to moisture, can be difficult to remove. A paste of baking soda and lemon juice can sometimes help with light rust spots, but deep rust indicates material degradation and could be a reason to avoid using the warmer.
- Electrical Safety Concerns: Remember, bottle warmers are electrical appliances. Never immerse the main unit in water. If you notice frayed wires, exposed electrical components, or any signs of electrical malfunction, the warmer is unsafe and should not be used or sold.
- When to Say Goodbye: Not all second-hand items are worth the effort. If a bottle warmer is heavily stained, has persistent mold inside non-removable parts, exhibits electrical faults, or shows significant wear and tear that compromises its integrity, it’s best to invest in a new one for your baby’s safety. Always check for product recalls via the Consumer Product Safety Commission (CPSC) before using any second-hand baby equipment.
Maintaining Hygiene and Safe Storage Post-Sanitization
Once your second-hand bottle warmer is thoroughly sanitized, maintaining its pristine condition is straightforward.
- Regular Cleaning: For daily use, wipe the exterior with a damp cloth and wash removable parts with mild soap and water after each use. This prevents milk residue buildup and keeps the warmer hygienic.
- Routine Descaling: Depending on your water hardness and frequency of use, descale your bottle warmer every 2-4 weeks using the vinegar method. This prevents limescale from re-accumulating and maintains heating efficiency.
- Use Distilled Water: To minimize mineral buildup significantly, consider using distilled water in your bottle warmer’s reservoir instead of tap water. This can reduce the frequency of descaling needed.
- Proper Storage: When not in use, ensure the bottle warmer is completely dry before storing it in a clean, dry place away from dust and humidity. If storing for an extended period, disassemble removable parts and store them separately. Unplug the device when not in use to save power and for safety.
- Follow Manufacturer Guidelines: Always adhere to the manufacturer’s specific cleaning and maintenance instructions, as they may have recommendations unique to your model.
Conclusion
Embracing second-hand items for your baby’s needs is a smart choice, and a pre-loved bottle warmer can be a valuable addition to your nursery. However, its journey from one family to another must always include a rigorous deep cleaning and sanitization process. By meticulously inspecting, cleaning with appropriate agents like vinegar and mild soap, and utilizing thorough sanitization methods such as boiling, steaming, or a CDC-recommended bleach solution, you effectively eliminate potential health risks. Prioritizing this essential preparation ensures your bottle warmer is not just functional, but impeccably hygienic and safe for your little one. What are your go-to tips for keeping baby gear perfectly clean?
Frequently Asked Questions
Can I use bleach to sanitize a bottle warmer?
Yes, according to the CDC, a diluted bleach solution can be used if boiling or steaming isn’t an option. Mix 2 teaspoons of unscented bleach per gallon of water, soak cleaned items for at least 2 minutes, and do not rinse. Allow to air-dry completely. Always verify your warmer’s manufacturer guidelines regarding bleach use for internal components.
How often should I descale my bottle warmer?
The frequency of descaling depends on your water hardness and how often you use the warmer. For optimal performance and hygiene, it’s generally recommended to descale your bottle warmer every 2 to 4 weeks, or whenever you notice mineral buildup.
What if I find mold inside my second-hand bottle warmer?
If you find mold, especially in hard-to-reach areas or if it’s deeply ingrained, it’s often safest to discard the bottle warmer. While some surface mold might be removed with a bleach solution, pervasive mold can be a health risk, and it may indicate that the warmer was not properly maintained.
Are all second-hand bottle warmers safe to use after cleaning?
Not necessarily. While thorough cleaning and sanitization significantly reduce risks, always inspect for physical damage, frayed wires, or any signs of electrical malfunction. Additionally, check for product recalls from the Consumer Product Safety Commission (CPSC) before using any second-hand baby equipment.
What are the signs a bottle warmer is beyond sanitization?
Signs that a bottle warmer is beyond safe sanitization include persistent, unremovable mold, significant rust, cracks or damage to the heating element or casing, exposed electrical wires, or any indicators that the appliance is not functioning correctly or safely. In such cases, replacing the warmer is the safest option.